 A continuum is something where the level difficulty increases in incremental steps. In this case the continuum is dealing with calculating the rate of change (slope) of a linear relationship.
We have previously posted a continuum for solving equations here and here but this one is a bit different. This one has five levels of determining the rate of change from a graph (in context) for a linear relationship. The first level shows lattice points, a rate triangle and the calculation of both rise and run (super basic) and the difficulty increases with each level (see below) until the last level where there is only a scale with no grid lines (so the answer is more of an estimate).

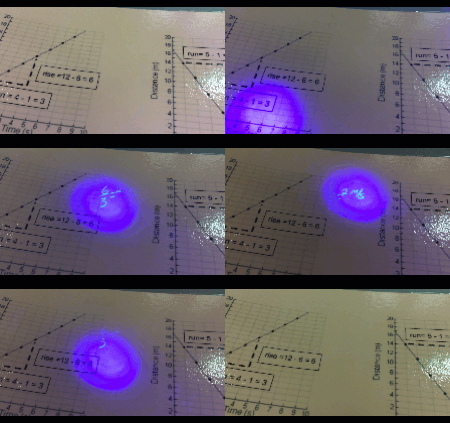
Each page has 6 graphs and students (once they choose the level to start with) choose to answer any three. If they do so correctly then they can move to the next level. The To make things a bit more fun, rather than check the answers with you, we suggest using a UV pen and ink written on the question cards for students to check.
This activity is probably best meant as a consolidation. Note that the expectation is about investigating so hopefully students will have had a chance to develop their own strategies for determining the rate of change. This activity just helps to scaffold it a bit in case they are having trouble (Eg a common mistake that students make when determining the rate of change when the line is in context is to just count boxes for the rise and run without considering the scale).
Note that we also have an Explain Everything version if you have students who have iPads (you may even want to try out the new Explain Everything Collaborative Whiteboard app to have students work in groups from different devices).
- MPM1D, MFM1P - determine, through investigation, connections among the representations of a constant rate of change of a linear relation.
- 20 copies of each of the question cards in different colour cardstock for each level, laminated (use colours that allow seeing the magic pen writing). Note that you may not need 20 copies of each. Perhaps fewer of the first couple levels and last level as most kids will probably be starting in the 2nd or 3rd level
- 3 sets of the answer cards (use magic pen to write the answers anywhere along each equation, they could be sideways, upside-down, (the answers are on the last page of the Google Doc). To help distinguish the answer cards to the question cards you should put a stamp or sticker on the back.
- 3 "magic" pens can be purchased at Chapters/Indigo or we found these at a Scholastic's book fair. We have since purchased some on eBay.

- For this activity to be successful, students must start at the appropriate envelope. If they start in one that is too hard they will be frustrated and if they start in one that is too easy they will be bored. Use an exit card (the day before) to help you decide which envelope each student should start in. When given back the exit card write down the level they will start in.
- Place the questions in piles in order of difficulty and set up three stations for the answer cards. Students will get a card and answer any 3 questions.
- To check their answers, they will go to a station and use the magic pens. Students may decide to do one question at a time and then go check their answer or they may do all 3 and then check. Students are monitoring themselves so they decide. If they get the first 3 right, they have a level of mastery to move themselves to the next level. If not there are more questions on the card until they master that type.
- As they move through the continuum, the hope is that they reach level 4 which matches the grade 9 curriculum. Since our goal is to get them to level 4, students should solve ALL equations on that card instead of just three.
- The fifth level is set up to challenge students who are moving forward quickly. They should solve all questions on this card. They require some estimation and so answers that students get should be approximate.

Note that for the Explain Everything version, there are still 6 possible graphs for each level but only two on each page. And to check the answer, slide the black ellipse to either the bottom left or right corner.
- Graphical Rate Continuum (Google Doc, PDF, Explain Everything)
- Entire Folder
Did you use this activity? Do you have a way to make it better? If so tell us in the comment section. Thanks


